You can create two types of Salesforce environments:
Before creating a Salesforce environment, ensure that you have the following:
To establish a connection, ensure that you have:
- Created a dedicated service account for erwin with Metadata Read-only privileges in the Salesforce Database.
- Generated and stored the Salesforce OAuth REST API Client ID and Client Secret parameters in advance.
- Network connectivity between erwin Data Intelligence and your Salesforce database.
Following permissions are required to scan metadata in Salesforce:
- System Permissions
- API Enabled
- View Setup and Configuration
- Object Permissions
- Read Only:
- EntityDefinition
- FieldDefinition
- ObjectPermissions
- FieldPermissions
- Read Only:
Salesforce JDBC driver is packaged out of box with the erwin DI application. Hence, no JDBC driver configuration is required at your end.
JDBC Connection Parameters
The Connection Properties tab displays the connection parameters to configure a connection to Salesforce.
Once connection parameters are entered, use these options ![]() to go to the next tab, test the connections, save and continue, or save and exit.
to go to the next tab, test the connections, save and continue, or save and exit.
Enter appropriate values in the fields (connection parameters). The fields marked with a red asterisk are mandatory.
|
Field Name |
Description |
|---|---|
|
Authentication Type |
Specifies the type of authentication Enter "JDBC". |
|
Driver Name |
Specifies the JDBC driver name for connecting to the database For example, com.ascendix.jdbc.salesforce.ForceDriver |
|
User Name |
Specifies the Salesforce user name For example, SF. |
|
Password |
Specifies the Salesforce(Service Account) password |
|
URL |
Specifies the full JDBC URL that is used to establish a connection with the database For example, jdbc:ascendix:salesforce://login.salesforce.com/xxxx It is automatically populated based on the other parameters. |
|
DBMS Instance Schema |
Specifies the schema of the database Use this option to select one or more schemas or leave it blank to retrieve all available schemas. |
To use database options, click ![]() (Options).
(Options).
The Database Options page appears. It displays the available database options. 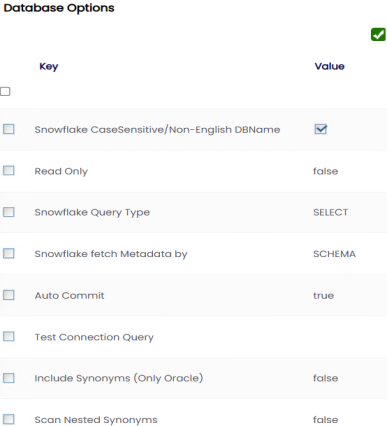
Select keys and double-click the cells under the Value column to set the values of the keys. Use ![]() to save the database options.
to save the database options.
Rest API
The Connection Properties tab displays the connection parameters to establish a connection for the Salesforce connection. You can authenticate the connection via Rest APIs.
Once the connection parameters are entered, use these options ![]() to go to the next tab, test the connections, save and continue, or save and exit.
to go to the next tab, test the connections, save and continue, or save and exit.
Enter appropriate values in the fields (connection parameters). The fields marked with a red asterisk are mandatory.
|
Field Name |
Description |
|---|---|
|
Authentication Type |
Specifies the type of authentication Enter "RestAPI". |
|
Client ID |
Specifies the client ID registered with Salesforce. This option is available only when the Authentication Type is set to RestAPI. |
|
Client Secret |
Specifies the corresponding client secret associated with the client ID. This option is available only when the Authentication Type is set to RestAPI. |
|
Instance URL |
Specifies the Salesforce instance URL that is used to establish a connection with the database For example, https://yourinstance.salesforce.com/
|
|
DBMS Instance Schema |
Specifies the schema of the database Use this option to select one or more schemas or leave it blank to retrieve all available schemas. |
To use database options, click ![]() (Options).
(Options).
The Database Options page appears. It displays the available database options.
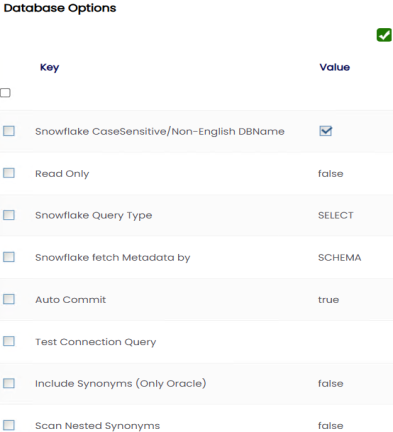
The TestConnectionQuery option is selected by default to validate the internal connection. The system displays exceptions if this option is not selected.
Select keys and double-click the cells under the Value column to set the values of the keys. Use ![]() to save the database options.
to save the database options.